Sunday, 21 January 2024

Mounting a Persistent SMB Network File share in Ubuntu

So, I was working on a local project that required me to mount a persistent SMB network file share in Ubuntu. I'd completely forgotten any commands needed for this (I've not done a great deal of network files sharing in Linux) so I did the usual research workflow - Google. I found some great info and forum posts and found the info I was looking for (or so I thought). I had the commands and I was off. 

However, when I'd done all the configuration, the network share would only mount as read only for me. I tried all sorts to resolve, checking the user rights on the network drive, checking the creds I'd used to connect. I even created another user account on the file server but every time the share was mounted as read only. I did notice that the share was mounted under the "root" user but I wasn't able to change the permissions, even as "root" - these are controlled by the file server!

I resorted back to Google and then found the answer - the command I was using was incomplete, there were a few more bits I needed to add. This wasn't that easy to find so I though I'd do a quick blog to have it all in one place:

System used for the demo: Ubuntu 22.04 (Jammy) Desktop VM, 2Gb Ram, 2 Cores, 25GB VHDD

First of all, do your homework:
On your File Server or NAS, Create or locate the share you want mounted - make a note!
Create Credentials for the share - I always use new credentials of each new system I share to - Make a note!
Decide where you're going to mount the drive, a popular place is /mnt/<sharename>

In my case, for this blog example the details were:

NAS share address: //10.1.1.52/Documents/Test
Credentials: username: rich / password: test123
Location to mount: /home/rich/share

You now need to install some software to enable Linux to communicate with the SMB share:
Make sure your repositories are up to date:
    sudo apt update
Install cifs-utils:
    sudo apt install cifs-utils

Install cifs-utils on Ubuntu

Create the folder for mounting the share:
    mkdir /home/rich/share

Make a directory on Ubuntu

Create the credential file (and note the location):
    sudo gedit .smbcredentials

Enter the username and password:
username=test
password=test123

Create credentials file

Save the file and close the editor.

Change the permissions for the file:
    chmod 600 .smbcredentials

Changing file permissions

Edit the /etc/fstab file:
This is where Ubuntu will take the information to mount the drive each time you boot / reboot the system.
    sudo nano /etc/fstab

Scroll down to a new line with the cursor keys and enter:
//<serveraddress>/<sharename>/(folder structure if required) /<directory to mount in>/<directory> cifs credentials=/<full path to file>/.smbcredentials, rw, uid=<your system username>, iocharset=utf8 0 0

so my line looks like this:
//10.1.1.52/Documents/Test /home/rich/share cifs credentials=/home/rich/.smbcredentials,rw, uid=rich,iocharset=utf8 0 0

Editing the fstab file

CTRL + X then Y and then Enter to save and close the file.


The moment of truth:
    sudo mount -a

If all goes well you should see the mount appear on the task bar, the left hand menu of Files and the files in the shared folder:

Mounted shared drive

Right clicking in the free space of the folder and selecting Properties shows the folder location and the Free Space (as 236.7GB) which is a lot more than the VM's hard drive. Now you can read and write to and from the folder as required.

Share folder properties

You can now reboot the system and the share will stay mounted.

Summing up:
In the code we put in the fstab file, the "rw" tells it the permissions we need (read/write); providing the "uid" tells it what user to mount the share for; using the .smbcredentials file after changing the permissions means that clear text creds are not in files readable by other users, keeping them more secure.
If you need to remove the share, it's as simple of deleting the line from the fstab file and rebooting.

Thanks for reading,
Rich.

Tuesday, 29 August 2023

Files and Folders in the Linux CLI

 Linux Basics - Files and Folders in the CLI

This post is an accompaniment to my YouTube series video - Files & Directories in the CLI, providing all the commands we looked at. If you're viewing this blog and have not seen the video, then take a look as we go through live demos of all the commands here.


In the last video, we looked at some basic navigation, moving in and out of Directories and listing the contents. In THIS video we’ll be looking at files and folders.

A lot of the contents in Linux are text files, or to be more accurate, files that contain text! These can range from simple text files to config files.

We (as users) need to be able to create, read and modify these type of files and that’s exactly what we’ll be looking at today.


touch {file name} - create a new file (will also modify the timestamp of a file if it already exists)


cp = copies a file


mv = moves / renames a file or directory


rm = removes a file (when it’s gone, it’s gone!)


mkdir {directory name} = creates a directory


rmdir  {directory name} = removes an empty directory


rm -rf {directory name} = removes a directory and all the files within


Spaces in file / directory names:

 The best practice for when a file uses multiple words is to use dashes or underscores to make things easier. If a file name has a space in it then you need to handle it slightly different on the CLI, otherwise Linux will interpret it as two (or more) different files.

Here are two ways to deal with spaces in file names on the CLI:

“file name.txt” or “directory name” = surround the whole file name (and path if using) with double or single quotes to tell the system to use all the characters as a string.

file\ name.txt or directory\ name = put a back slash (\) before the space to "escape" the space and treat it as a character in the string.

Finding files:

find . -name ‘file*.txt’ = searches in the current directory and sub directories for a file with a name starting with “file” and the extension of .txt - case sensitive.

find . -iname ‘file*.txt’ = searches in the current directory and sub directories for a file with a name starting with “file” and the extension of .txt - case insensitive.

In the next Blog and Video, we'll be looking at reading files in the CLI via a few methods. Be sure not to miss it!


Thanks for reading.

Rich.

Monday, 21 August 2023

Introduction to the Linux Command Line

Linux Basics -  Introduction to the Linux Command Line

This post is an accompaniment to my YouTube series video - Intro to Linux CLI providing all the commands we looked at. If you're viewing this blog and have not seen the video, then take a look as we go through live demos of all the commands here.


The command line is the most powerful place in Linux and Windows. In Linux we use the Terminal to access the CLI.

The Linux CLI is case sensitive so attention to detail when entering commands is vital!

You use the CLI by providing commands and arguments - every action in a GUI is actually a bunch of commands and arguments in the background.


In the CLI:

$ prompt = standard user 

Standard User Prompt $

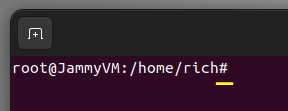
“#” prompt = root/super user

Super User Prompt #

Sudo - What is it and what does it mean. Sudo is the Linux equivalent of the Windows Administrator. It stands for Super User DO. It elevates the privileges of your standard account to administrator level (Super User) to perform certain tasks.

whoami = shows the current user

hostname = shows the name of the host machine

pwd = shows the current working directory - essential for knowing where in the file system you are

To update your system:

sudo apt update && sudo apt upgrade -y -  "sudo" is us asking the system to elevate our privileges to carry out the following command. "apt" is the command that we will carry out, which is the package manager for the likes of Kali and Ubuntu. "update" is the argument, what we want the command to do (to update the repositories). The double 'and' sign "&&" is chaining two commands together. Next we elevate our privileges again, run the "apt" command but this time pass the "upgrade" argument to tell the system to install the updates. Finally, we pass this command another argument of "-y" to tell the system to not prompt us before installing.

This can take anywhere from a few seconds to 15 minutes, depending on how recently the system was last upgraded!

clear or <ctrl>l = clear the screen

<ctrl>c = will break the running command

<ctrl><shift>c = copy

<ctrl><shift>v = paste

<ctrl>left arrow = move to the start of word to the left of the cursor

<ctrl>right arrow = move to the end of the word to the right of the cursor

arrow up = scroll up through command history

arrow down = scroll down through command history

history = shows all command history

!n = use the line n in the command history list (after showing the history list)

history -c = clear the command history


When starting out, use the GUI to help find your way around!


ls = shows a list of the files and directories contained in the current directory (contents of the current working directory)

ls -lah = is useful as it shows the long format, all files and folders (even hidden ones) and human-readable.

cd .. = (change directory) navigates backwards one directory - the prompt will change to reflect the new working directory

cd ../.. = will go back 2 directories

cd {directory name} = navigates into the specified directory - the prompt will change to reflect the new working directory

man {command} = shows the manual page for the specified command - useful when you need to know what the command does and the arguments it supports etc. Press q to exit the manual page.

{command} --help = (command then 2 dashes then help) will show brief info about the command and it’s usage options.


https://explainshell.com/ = for more help on commands.


In the next Blog and Video, we'll be looking at Files and Directories on the Command Line.


Thanks for reading.

Rich.

Saturday, 29 July 2023

Securing your Online World

Password Managers!

 One of the easiest way to get hacked, and it’s still one of the most popular methods is through weak and/or re-used passwords. You’ve probably heard this all before so I’m not going to rant on and on till you wander off and bury your head in the sand, I’m just going to tell you that you need to sort it! …… and show you how!

 Welcome to the world of Password Managers! The good, the not so good and the really not so good. There are a tonne of them out there so I’ll give a quick run down of a bunch, talk about my favourite: Roboform*, and why I use it, then send you off on your merry way to research and sign up to one of your choosing .... and then start using it! There is no real, good reason for you not to be using one.

 These are in no particular order, rank or favouritism. In fact, I’ll do them in alphabetical order to avoid any conflict:

1Password

Protect yourself, your family, or your global workforce with simple security, easy collaboration, and actionable insights. 1Password is a popular manager with very similar functionality to RoboForm although a little pricier. For business use you can generate logs which can be diverted to SIEM solutions. 

Having not used the service myself I've browsed their documentation, but it doesn't seem to have a built in authenticator - which is a massive requirement for me. Having an all in one solution makes for a much better user experience, without having to load up multiple apps. There doesn't seem to be an app for PC either which means for passwords on desktop apps you'll need to retrieve them from a browser.
You can check them out at: https://1password.com/


Bitdefender

Bitdefender Password Manager is a multi-platform service that helps you store and organize all your online passwords. It comes with the strongest known cryptographic algorithms, so your online credentials are safe and secure. Easily manage your logins with the help of a single master password.

This seems a very similar offering to most of the other managers, has a built in Password Generator, works on all browsers - but no actual PC app, and includes password leak alerts.


Bitwarden

Bitwarden is an Open Source password manager which is again browser based and includes mobile apps. Bitwarden does include and Authenticator in it's Premium account and at just $10 a year it's a pretty hard option to ignore. If you don't need the authenticator then they have a totally free account!


Dashlane

Built for individuals who want to secure and optimize their online lives. Dashlane makes it effortless for you to access your passwords, passkeys, payment information, and IDs anywhere you are, across any device. Dashlane incorporates a nice password generator which is very similar to the one I use with RoboForm and also checks the Dark Web for any breaches (but only on a paid plan!). There is a free plan for their basic Password manager and 3 further plan tiers at additional pricing which include extra features as the plan increases.
Find out more about Dashlane: Free Password Manger | Dashlane


Google

Google password manager is available on Google Chrome and Android devices. If all you use is Android / Google devices then this is probably the best option for you. However, if you use a PC / Mac, you'll need to be using the Chrome browser. Google also have their Authenticator app which works just fine but again, what ever device you're using you'll need access to your google account. Check your Google account for more info.


KeePass

KeePass is a free open source password manager, which helps you to manage your passwords in a secure way. You can store all your passwords in one database, which is locked with a master key. So you only have to remember one single master key to unlock the whole database. Database files are encrypted using the best and most secure encryption algorithms currently known (AES-256, ChaCha20 and Twofish).
KeePass is software based and is totally free, you can even have it just on a USB stick. It's probably a little more of an advanced option for the more IT proficient!
Check out KeePass here:  https://keepass.info/


Keeper

Never forget another password with Keeper Password Manager. Easily create and store your passwords in a secure personal password vault that you can access from any device. Keeper has 2 paid plans, has a Mobile App or is browser based. There's no mention of and Authenticator function with Keeper so at it's price point is a little on the expensive side.
Keeper can be found at: https://www.keepersecurity.com/


LastPass

We'll just leave this one for now. Multiple recent breaches make me want to stay away from this one until they improve their systems a bit!


Microsoft Edge

It looks like Microsoft has improved it’s password manager offering with the Wallet which includes a Health Check for your passwords. It can keep track of your Payment info, Passwords and personal info. Edge can also suggest passwords for you. 

The downside are: The Authenticator function for MFA is a separate standalone app. To have the password manager on all devices, you will need to install Edge Browser on them all and use that to surf the web using your stored passwords (all except on Chrome Books which don't support Edge). It’s good but not very efficient for me. TechRadar have a good write up on it here.


NordPass

All of your passwords, credit cards, and personal info in a single secure place. Never forget another password again. Create strong and unique passwords, securely store them in a single place, and autofill them with just a few clicks. Nordpass includes the usual password generator and breach alerts (int he paid plan). The have a free plan for the basic manager, a premium and family option which include all the available features. Again, there's no authenticator component with Nordpass. Discounts may be available if you have their VPN service!


Norton

Norton's offering is a cloud based password manager with browser extensions available and apps for Android and iOS. It appears to be free but is only available on Android and iOS devices with Fingerprint Authentication or Touch ID/Face ID activated. If you already have a Norton account and want a basic password manager then this seems like a great option.


Passbolt

Passbolt is another Open Source manager more aimed at business users. Passbolt can be downloaded and installed on a server, VM or Docker instance and again more for the IT proficient audience. They do have a free offering which is fairly feature rich but it does require configuration to get it up and running.
Find out more about Passbolt here: Passbolt: The Open Source Password Manager For Teams


RoboForm

RoboForm is utilised via a Browser Extension compatible with many browsers or via an app, be it Windows, Mac, iOS, Android, Linux or Chromebook. It can keep track of all of your usernames and passwords, personal info, payment info. RoboForm securely scans for weak, duplicate, or compromised passwords and alerts you if any are found in documented breaches.

It also has a built in Password Generator and Authenticator making it and all in one solution. You can log in with a single click into almost any account or app on any webpage, browser or device and will sync your data across all your devices. Having the built in Authenticator is a massive bonus for the price, which means that when RoboForm enters the Username and Password, as soon as the website requests a TOTP (Time Based One Time Passcode) RoboForm is ready to respond with it immediately.

I use RoboForm Password Manager everyday on all of my devices and love it; I think you would too!
As a first time user,when you purchase a RoboForm Everywhere subscription using my referral link, you'll receive and additional 6 months for Free!

Purchase and learn more about RoboForm Everywhere click here*.


Conclusion

All that's left now is for you to pick one, sign up and start using it!

Thanks for reading,
Rich.


If you find any incorrect or missing details that you feel need correcting, then please feel free to drop me a comment and I'll get them fixed asap.

*These links are affiliate links, should you click and sign up via this link I will receive a small extension to my plan which helps me keep the costs down in creating content, and I thank you for it.


Thursday, 27 July 2023

The Richinthecloud YouTube Channel

 The blog has been a little quite recently as I've been focusing on some training and the creation of my new YouYube channel - https://www.youtube.com/@richinthecloud/. People ingest information in different ways, some prefer reading so the blog is an excellent choice. However, some prefer a more visual style - watching video's, so the YouTube channel seemed a perfectly natural opportunity to reach the more visually inclined. 

The channel is also a great way for me to really get my point across and get into the nitty gritty of subjects which would otherwise result in a short novel. The channel will mirror the blog content but dive deeper into details with near real time walkthroughs and additional thoughts. What I'm creating is raw, down to earth and shot with one take, so there's no post editing - you get to see all the mistakes that I can make and any errors/pitfalls that can pop up along the way. Hopefully this provides a more real world experience for the people curious about IT and Cyber along with those looking to start learning or break into the field of Cyber Security.

Watch the welcome video here and whilst you're there, why not subscribe so you're kept up to date with the latest releases and content. I'd love to have you along to keep me company!


Thanks for reading,

Rich.

Friday, 21 July 2023

Running your first Nessus Scan

Running your first Nessus Scan


If you've just installed Nessus Essentials and are now sat wondering what next, to give you a quick idea, we'll do a first scan to show you how it works. If you've not yet installed Nessus but want to, check out my last post on "Installing Nessus Essentials on Kali Linux". Lets get scanning...

Following on from where we left off or from opening Nessus, if you're not on the screen below, click "My Scans" from the left hand menu and then "New Scan" on the top right of the page to bring you to our stating point:

Scan Templates

Click the "Basic Network Scan" button. In the Name field, you can give the scan a name to identify it (useful if you configure a scan that you want to run again in the future), I'll call mine Test, you can give it a description where you can details the reason for the scan or the configuration used but I'm leaving mine blank. The Targets field is where you need to put your IP addresses for the scan, I'm just going to use the loopback address to scan the local machine (you could also create a file of IP addresses and upload that to save typing them all in). I'm not going to go through the rest of the options as they're not required for a quick scan but you can explore them at your own leisure.

Basic scan settings

Click Save. Now you have a Scan saved to My Scans that you can find, run and rerun as required. 

Saved scan

To kick off the scan, click the little Play icon (or the launch button as it's called) to the right (the X will delete the saved scan!) and you'll see the Update icon, the Play button turns to a Pause button and the last scanned field gets updated. Sit back and wait for the scan to complete.

Scan running

Once complete, the update icon turns to a tick. Click on the scan to see the results:

Scan Overview

The top bar shows 3 tabs. Hosts shows the Hosts scanned and an overview of the scan results. The Vulnerabilities tab, well, shows the vulnerabilities. In my case 42 of them (eek). 

Detected vulnerabilities


When you click on the tab, you get the full list and you can click on each to get a detailed view of the vulnerability description with CVE links:

Vulnerability details


You may also get a solution to mitigate the vulnerability (now would be the time to go fix it!):

Vulnerability mitigations

And that's the basic power of Nessus Essentials. This has been a quick tutorial to get a first scan in the bag. There are many more options, settings and scan types that you can run and I'd encourage you to explore. You can find out more info from the Nessus documentation page at Nessus Documentation | Tenable™ or from their community pages at Home (tenable.com) 

I hope you enjoyed this quick walkthrough of running your first scan, thanks for reading.

Rich.


Credits:


Thursday, 20 July 2023

Installing Nessus Essentials on Kali Linux


Installing Nessus Essentials on Kali Linux

Nessus is a powerful attack surface vulnerability scanner from Tenable. Download Tenable Nessus Vulnerability Assessment | Tenable®. 

I've seen a few walkthroughs for Nessus Essentials and this is another one, but when I came to install it, I found that with the updates to Nessus, a lot of the screen shots were out of date so I thought I'd do a more recent walkthrough. I'm installing Nessus on a Kali Linux VM running in VMWare Workstation 17 Player (I'll do another write up for that install). I've now created a YouTube walkthrough which you can follow along with and see the install in a live demo here.

Open Firefox and browse to https://www.tenable.com/downloads/nessus - to download Nessus.

Select Version and OS platform (normally picked up be default) and click the Download button:

Download Options for Nessus

Accept the Licence Agreement to (feel free to read it all at your leisure):

Downloading Nessus


Nessus Download Complete

Once downloaded, open a terminal, sudo su to switch to root (if not already), cd into Downloads folder cd Downloads/ and start typing the following command dpkg -i nessus then hit Tab to auto complete the file path (if it doesn’t auto complete, replace nessus with the full file name) and hit enter:

Nessus install command

Once installed run /bin/systemctl start nessusd.service to start the Nessus service:

Nessus install complete

Then go back to Firefox and browse to https://kali:8834 - You will need to click “Advanced…”, scroll down and then click “Accept the Risk and Continue” as Nessus is using a self signed Certificate that cannot be verified (which is ok as it’s an internal system) to reach the Welcome page:

Welcome to Nessus

Click the Continue button and then select “Register for Nessus Essentials” and continue:

Selecting Nessus Essentials

You will need to enter your details, this will provide a one time activation code (which cannot be used again so I’ve found that some non genuine details will work fine for me here as I already have a working version in my home lab which I registered with my real details. This install will be torn down with the lab I've created just for a specific course), then click Register:

Registering Nessus Essentials

Then click continue on the next screen:


Activation code

Create a user name and password - this will be for you to log into Nessus so make sure you write down or remember these details! Then hit “Submit”:

Create user credentials

Nessus will then download it’s required plugins, this could take a few minutes:

Downloading plugins

After a short wait, Nessus will open and start compiling the plugins:

Compiling plugins

Wait for the plugins to compile, indicated by this spinning update icon. This bit will take many minutes, now’s the time to grab a fresh brew, some lunch, walk the dog … you get the idea. Once it’s gone you’re good to go:

Compiling in progress

Compiling complete

You’re taken to the My Scans page by default where you can explore or run your first scan:

Ready to scan

Click the New Scan button in the top right of the screen and you'll be taken to the Scan Templates page. Here you'll see the extent of what Nessus can deliver. As this is the free version of Nessus, some of the templates won't be available, requiring a paid licence to run. In this free version we can scan up to 16 private IP addresses in one go. 

Scan Templates

For the installation stage, we're now done - congratulations you now have a functioning vulnerability scanner for your lab, home network or small business.

I hope you've enjoyed this walkthrough of Installing Nessus Essentials on Kali Linux, in the next post I'll do a quick walkthrough of "Running your first Nessus Scan". I've not added it here as this post is long enough as it is!

Thanks for reading.

Rich.


Credits:


YouTube Video Link: Installing Nessus on Kali

Monday, 26 June 2023

Greenbone Vulnerability Scanner

Greenbone Vulnerability Scanner

What is Vulnerability Management?

"Vulnerability management is an IT security process that aims to find vulnerabilities in the IT infrastructure, classify their severity and, in addition, provide a list of actions to be taken to address the vulnerabilities. The goal is to eliminate vulnerabilities so that they can no longer pose a risk." - taken from the greenbone.net website.

First steps...

In an effort to play with as many tools as I can I decided to install Greenbone Vulnerability Scanner. It’s a tool that has featured in some of the online training platforms I’ve used like Try Hack Me so it was a good choice to try. I’ve already got a Nessus Essentials scanner but seeing how many different tools work can be useful to see which I prefer and which works best for me. This is a bit of a long one so go grab a brew now then strap in….

I kicked off the research by watching a couple of YouTube video’s and installation looked pretty simple so I went ahead and installed a fresh Kali Purple VM on my ProxMox machine. Probably not the best choice of OS as I found out after a few issues but it was the OS used in the videos and it seemed to work for the presenters. GVM is the package used to install the scanner, manager, portal and all the dependencies required to make it work.

Kali Purple

Sometimes it doesn't always work out...

My first attempt failed miserably. I installed Kali and updated it, installed GVM and ran the setup script. After running the “check-setup” script to make sure everything had gone to plan I tried to connect to the Web Portal from a different computer to find that it wasn’t reachable. So, I went back to the Kali VM and launched Firefox to connect to the portal on the loopback address … but that didn’t work either. I had the right address each time and the port number but nothing would connect. Then, I realised a major mistake I’d made … I didn’t take a snapshot of the VM after installing and updating Kali. I was so rushed to get the tool installed and get playing with it I carried out a cardinal sin! Nothing I tried would resolve the issue and after turning to Google for a bit of research I discovered that Kali is NOT a supported OS to run GVM on and people who’d had the same issue as me didn’t seem to get any other answers than “install it on a supported OS”. Well, I’d seen it work on Kali so being as it’s a VM I hit the big delete button and started again.

If at first you don't succeed...

This time I installed Kali, ran the updates and then took a snapshot, I wasn’t going to waste all that time again! After that, I installed GVM and then went and watched some TV whilst the setup ran. Coming back to the VM I had my login password and was feeling hopeful. I ran the check set up script and all looked good. This time, I fired up Firefox, punched in the Loopback address and port and  … Hey Presto! I’m in! 

Greenbone Security Assistant login page

I’d seen some other issues that people had had with GVM so I tried to execute a quick scan and encountered the same as a lot of the others … a “Failed to find config” error. Luckily, there was a YouTube video to help. The fix suggested was to run the feed update scripts to update the feeds and scan configs then everything magically works. NO it doesn’t – well not for me anyway. Back to Google where I found a forum where this very issues was being discussed (and the obligatory “Kali isn’t a supported OS” message was repeated many times. The fix offered was to run individual feed update scripts (instead of the default bulk one that I had done) and then I read the important bit at the bottom … “WAIT!”. Turns out that updating the feeds pulls down the updates, then GVM needs to import them for things to work properly (which it does as part of the script but in the background). You need to check the ‘Administration/Feed Status’ page and wait for all the entries to turn to current. So, I ran the scripts one by one and watched some more TV. On my return I checked the terminal to make sure all was complete and noticed that this time, the scripts seemed to had pulled down incremental files, which may have been what was needed to complete the update. I checked the Scan Configs and BOOM! There they were, all the Feed updates showed as ‘Current’. 

Feed Updates status

Scan Configs

I was so excited to go run my first scan, I almost forgot ….. SNAPSHOT! Snapshot taken and my very first Greenbone scan was under way. The good news … “0’s” across the board 😊.

1st scan running

Scan complete, looking good!

Next steps for me...

I’m planning to move this ProxMox machine to my IOT network so I can scan all of the lovely speakers and camera’s etc I have to see just how secure they are, and if I spot a few older ones with some nice vulnerabilities … well, they may get replaced with new ones and then the old ones used as targets!

Final thoughts and process...

I wouldn’t say that this was a quick project, although it was all done in a day I was hoping for more like a couple of hours but there again, I did come across issues. So, here’s basically the steps needed to install, setup and update the Greenbone Vulnerability Scanner:

Install / use a Linux VM as the base OS – Greenbone suggested on their forum post from May 2022 that “Debian 11 should be fine” but I can confirm that this works on Kali! (Missing scan configuration - Archive / Greenbone Community Edition - Greenbone Community Forum)

  • On the Linux machine, run “sudo apt update” – to make sure your repos are cleaned up and up to date.
  • Now run  sudo apt install gvm  – this installs the GVM program and any dependencies, but you can’t use it yet!
  • Once the install has completed, run  sudo gvm-setup  – this may take a while, grab a brew.
  • Once the setup has completed a system generated password for the ‘admin’ user account will be shown near the end of the setup output. It’s big! Copy it and paste it into a text file and save it. There are ways to get around it if you don’t but it just makes life easier if you do.
  •  Now run  sudo gvm-check-setup -h  – this should only take a couple of minutes, check the output to see if there was any errors, you should get a line at the bottom to say it looks ok.
  • Once the check is complete, run  sudo gvm-feed-update -h  – this will trigger the feed updates … and may take a while … grab a brew! You can also connect to the portal now at: “hxxps://127.0.0.1:9392”, log in with user name “admin” and your system generated password (you did save it didn’t you???) and navigate to ‘Administration/Feed Updates’ to monitor their progress.
  • Once everything is showing as complete, you can try a quick scan to see if it works. If it does, congratulations, you now have a Greenbone Vulnerability Scanner. If it presents an error message then run these additional steps, one at a time:

o   Run  sudo runuser -u _gvm -- greenbone-nvt-sync  and wait for it to complete

o   Run  sudo runuser -u _gvm -- greenbone-feed-sync --type SCAP  and wait for it to complete

o   Run  sudo runuser -u _gvm -- greenbone-feed-sync --type CERT  and wait for it to complete

o   Run  sudo runuser -u _gvm -- greenbone-feed-sync --type GVMD_DATA  and wait for it to complete

o   Now go to the Feed Updates page on the portal and wait for them all to complete ... maybe time for another brew! Possibly some biscuits? Well, you do have the time!

o   Once they’re all complete try a quick scan. If it still doesn't work after this, my only advice is to leave it running and try again later. After that, revert to an earlier snapshot before you installed GVM and start it again … wait … you did take a snapshot right?


Thanks for reading,
Rich.

Credits: 

Vulnerability Management | Open Source and GDPR-compliant - Greenbone

Kali Linux 2023.1 Release (Kali Purple & Python Changes) | Kali Linux Blog

Sunday, 25 June 2023

Private VPN Server Install

Having a Home Lab is great ... at home, but what if you want to access it whilst you're out and about? This was my problem so I set about a bit of research. After comparing a couple of offerings I chose WireGuard VPN as it seemed fast, secure and reliable. Best of all it is free and reasonably simple to set up.

WireGuard VPN


I had a spare Raspberry Pi3 knocking around so I installed Raspbian on a MicroSD card, booted, ran the updates and we were ready to go. As this was a going to be a bit of a test and proof of concept for me, I decided to install WireGuard via PiVPN. Installation is guided, setup is relatively easy and administration is simple. 

  curl -L https://install.pivpn.io | bash  

During the install I did need to go out and set up a Dynamic DNS service through a popular web vendor as my ISP uses dynamic IP addresses, meaning that once I'd set up the VPN and the IP changed, I would not be able to access it again until I reconfigured the config files. Not very useful if you're not at home and can't check your public IP. I checked the setting to enable unattended updates so that I didn't need to keep logging into the Pi to manually update and patch it every week. 

I set up a Test user to trial the VPN, installed the Wireguard client on my phone, generated the QR code from the server on the Pi, scanned it via the client, switched it on and ..... NOTHING.

Creating a Test user


A bit more research and head scratching found that I needed to set port forwarding on my router before I could reach the server. I also found that once this worked, I had to enable IPv4 Forwarding on the Pi so that the VPN would work fully. The Pi also needs a static IP address on the internal network to ensure this works which is mention during the install script.

  sudo sysctl -w net.ipv4.ip_forward=1  

After all that, Hey Presto, a working Point to Site VPN connection from the outside world and I could access all my lab machines and files. To keep things secure, I deleted the test account and set new ones up each for my laptop, phone and tablet.

All in all a very worthwhile and incredibly useful project that's taught me about VPN connections and that although things don't always work straight out of the box, with a little persistence and research you can fix it. The PiVPN (using WireGuard) can be set up on various hardware like Raspberry Pi's or even in a virtual machine - anything that will be left on permanently.


Credit to PiVPN - PIVPN: Simplest way to setup a VPN (no affiliation, just a great product and project)

Saturday, 24 June 2023

CompTIA Security+ CE Certification

On May 9th 2023 I successfully passed the CompTIA Security+ CE exam. Here I'd like to share my thoughts and experiences with studying towards and taking the exam.

Passing the Network+ was the first step towards a career in Cyber for me. I believe that you need to have a foundational knowledge of networking and how everything communicates before you can think about how to secure it all. You can read about my experiences with the Network+ here.


What training resources did I use to study for the Security+?

The Security+ cert is a lot more important to me so I wanted to not just be able to pass the exam but to really understand the fundamentals. To do this I used similar resources to study for the exam as I did with the Network+ but then took it further. So here's what I used:

  • The official Study Guide from Sybex. Again I read through the whole book, using the end of chapter practice tests to reinforce the info.
  • Again I used LinkedIn Learning and I watched through the course presented by Mike Chapple. It's still pretty much taken from the book but it's a lot better having the audio and slides to help take it all in. I also watched through his SSCP course as the two are very similar and once of the sections on the SSCP is taken from the Security+ course (he forgot to change the info on one of the slides!)
  • I watched the videos provided by Professor Messer as these gave an alternative take on the topics, providing his own explanations and visual content. These videos were great to help understanding and the reinforce the information being taken in. I would encourage anyone studying for or looking to study for the Security+ to watch them. You can view them all for free on YouTube or visit his site where you can purchase his full course which includes other learning materials. Home - Professor Messer IT Certification Training - CompTIA A+, Network+, Security+ - (no affiliation to Professor Messer or his site / content, I just think it's really good!)
  • Practice tests - I used the ones from Wiley's online Sybex Test Prep site but also did a couple from ITProTV. The ITProTV ones were really difficult in comparison, but I wanted to be challenged more (and I got my wish!). Again, neither really prepare you for the style and content of the questions on the exam.
  • I was also doing a lot on online training platforms like Try Hack Me and LetsDefend, to try and get a feel for some of the tools and concepts. I think this helped more with the questions around attacks and the like.

What's it like taking the exam?


I sat the exam via OnVue, Pearson Vue's online testing platform as there wasn't a local test centre offering the exam. It's a relatively easy way to take the exam, you just need a laptop in a quiet room free of other people and anything that could be used to cheat.

Obviously, it was the same experience as when I took the Network+ exam, with the setup and the annoyingly vague questions but I got a lot more Performance Based questions than I was expecting. The performance questions did tax me and took a lot of time, to the piont that there wasn't much left at the end fo the exam. I'm almost inclined to agree with the people who say flag them and leave them till last to make sure you get the bulk of the other questions done. Again, the biggest piece of advice I could offer for anyone taking this, or any exam for that matter, would be to READ THE QUESTION! It's so important to read it properly and understand what it's asking. It took me a lot longer to complete this exam as I was having to re-read the questions to make sure I knew what they were asking for (still didn't work all of the time).


What did I struggle with?


Well, from a content point of view, Cryptography, Standards and Compliance. I know they're all super important but boy can reading about them put you to sleep. These are areas that I know I need to pay a little more attention to as I continue my education.

Another area I struggled with was focus. Whilst studying, I was also trying to learn much much more. I was spending time on Try Hack Me, the Microsoft Ignite- Protect Everything Challenge, tinkering with my home lab and new tools. Although it was valuable learning it was time taken away from focusing on the Security+ course. I'd get to a topic in the book and think "ooh, that sounds interesting, let me have a look on the internet" and off I'd go researching it. Not necessarily a bad thing, but one thing does lead to another and then down a rabbit hole.

All these things have had a mental note taken of them so when it comes to the next Cert, I'll work a lot smarter.


What are my take aways from gaining the certification?


Foundational Knowledge! It's so important to get to grips with the basics and foundations. As I'd studied a lot for this exam (to the point I thought I'd broken my brain on the weekend before the exam) passing was not only a huge relief but a massive boost to my self confidence. Not only could I talk the talk, but now I have a piece of paper (or digital badge at the time) to prove I can walk the walk ... on a foundational level of course.

To anyone studying towards or looking to take this exam, Good Luck and don't rely on just one source of learning. There's loads of free content out there, especially on YouTube and whenever you think you're ready to sit the exam, by all means book it in but do a lot more studying 😉.


Friday, 23 June 2023

CompTIA Network+ CE Certification

On January 30th 2023 I successfully passed the CompTIA Network+ CE exam. Here I'd like to share my thoughts and experiences with studying towards and taking the exam.


What training resources did I use to study for the Network+?

I used a number of methods to study, along with using my existing knowledge from previously being a Helpdesk Analyst and from setting up my home networks and labs. Other methods I used are:

  • The official Study Guide from Sybex. I read through the book alongside other study methods to get a good foundational knowledge of the content. I must say that although it generally well written and I recommend reading the book, I did come across a couple of errors in the text as well as at least one of the questions where the answer given was actually incorrect (confirmed by a trainer I consulted).
  • I was incredibly lucky to have been given the opportunity of a mentoring group internally provided by my current company and run by one of their training experts. We met weekly, reviewing the material from the Study guide and having discussions and quizzes to help enforce the knowledge and identify any weaknesses. This really was a great tool as it gave me the opportunity to query topics that I wasn't overly confident on.
  • LinkedIn Learning has a number of courses and I watched through the one presented by Mike Chapple. The content was pretty much from the Study Guide but with the benefit of embellishments and descriptions with visuals from Mike. I think that having the intakes of visual and audible learning is a massive benefit giving your brain different ways to absorb the information.
  • I watched the videos provided by Professor Messer as these gave an alternative take on the topics, providing his own explanations and visual content. These videos were great to help understanding and the reinforce the information being taken in. I would encourage anyone studying for or looking to study for the Network+ to watch them. You can view them all for free on YouTube or visit his site where you can purchase his full course which includes other learning materials. Home - Professor Messer IT Certification Training - CompTIA A+, Network+, Security+ - (no affiliation to Professor Messer or his site / content, I just think it's really good!)

It's a lot of information and content to take in, trying to memorise Ports, Subnet calculators, IEEE standards, what's at what layer of the OSI model and what it does / how it interacts with other layers etc., so time is required to take it all in. After all this learning it's time to take the exam.


What's it like taking the exam?


I sat the exam via OnVue, Pearson Vue's online testing platform as there wasn't a local test centre offering the exam. It's a relatively easy way to take the exam, you just need a laptop in a quiet room free of other people and anything that could be used to cheat.

Having done practice tests from the Study Guide and via Wiley's online Sybex Test Prep practice exam website can can whole heartedly say that they DO NOT prepare you for the style nor content of the exam questions - and it was a bit of a shock for me, even after the performance based questions. This was the second online exam I'd taken and the nerves didn't get any better. Questions are annoyingly vague but this is to 1: make you think about the situation they are describing and 2: test your knowledge and real understanding. The biggest piece of advice I could offer for anyone taking this, or any exam for that matter, would be to READ THE QUESTION! It's so important to read it properly and understand what it's asking, I've been caught out so many times by misinterpreting a cleverly worded question.


What are your take aways from gaining the certification?


Studying the syllabus has not only reinforced what I already knew but taught me so much more. A lot of it I will never need ever again (much the same with any subject) but having the knowledge and knowing where to find it again if I forget will be a great help in the future.

The benefit of actually taking and passing the exam is twofold. Not only does it give me a sense of pride and self belief but I can now prove my abilities to potential employers and demonstrate that I can and am willing to learn and am serious about what I want to do. 

To anyone studying towards or looking to take this exam, Good Luck and don't rely on just one source of learning. There's loads of free content out there, especially on YouTube and whenever you think you're ready to sit the exam, by all means book it in but do a lot more studying 😉.


Popular Posts